


Creating Bokeh
Ever wonder how to get this effect?
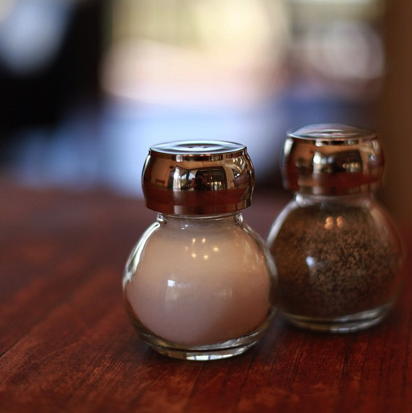
The bokeh style has been used in countless photographs, where the subject is shown to be clear and the background blurred out. This technique has been used in close-ups to capture a creative detail and emphasize an aspect of your picture. More recently, Bokeh has evolved from it's original meaning of describing the quality of any blurred background (see below) to more specialized techniques (seen above).
In reality, any camera can take photographs with bokeh as long as you are able to set the correct mode. You'll need a large aperture and a short focal distance. Try turning your camera to aperture priority mode and choose an f stop of (f/1.8 to f/4).

To get the best possible bokeh, have the subject as close to the lens as possible. Focusing on the close object will cause the items farther away in your background to blur nicely.

A fun way to get creative with your pictures by using bokeh is manipulating the picture into giving you shapes with the blurred out background. You’ll only need a few supplies that you can easily find at home to create beautiful and fun pictures! What you’ll need is your camera of course, scissors, a pencil, a shaped hole punch, a rubber band, a tripod (or very steady hands),and dark-colored stock paper because of its thickness and durability.
On your paper, trace the outline of your lens. Dark-colored stock paper will work best because it will block out light, but white will work as well at night time. Next draw three “wings” about an inch long and cut the whole shape out. The next step is cutting out the shape you want your bokeh to be in the middle. This is where either the shaped hole-punch or your pencil will come in handy. It’s up to you whether you prefer to draw and cut out the shape in the center or to simply hole punch your shape. Remember that whether you choose to draw it yourself or hole-punch the shape to keep the shape centered and small, but not being bigger than the size of a dime. Next place the paper over your lens and use the rubber band to hold it in place. Lastly grab your tripod, switch to manual lens, set up your camera, and find your object! Remember, the more out of focus the picture is the bigger the shape will turn out.
